The Website Homepage
Your Homepage can appear in many ways - like a media portal, a blog, a collection of blogs, a directory of sub-websites, a magazine, or a single page. It can be shaped to reflect any content scheme you prefer. Here´s how...
Click on any image in this guide to view it full sized.
SELECT A HOMEPAGE MODE
There are two basic Homepage modes - Single Page and Portal. Choose Portal if you want the Homepage to be a collection of other pages.
To Use Single Page Mode
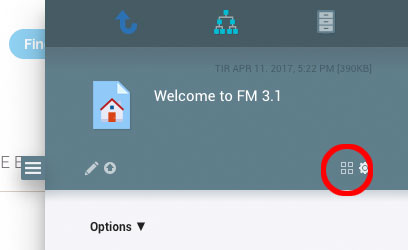
 If the Portal is configured to be the Homepage: go to your Dashboard [click any Home link], click More Actions there, then the Layout Button [circled in the picture] - and check the Homepage checkbox in the dialog that opens up.
If it is already defined as the Homepage: go to your Dashboard, then click the Homepage button there to edit the Homepage.
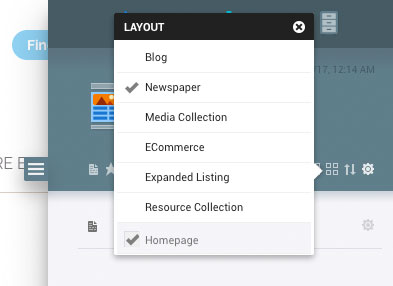
The Homepage behaves like a regular Webpage. You can compose text, insert images and slideshows, and in general edit it like an Office document. However, it has some extra features: click More Actions [the Gears Icon], then the Layout Action to bring up the Homepage Layout dialog. It will now have the following alternatives:
- Default: standard Homepage.
- Sign In: adds a Sign In box to the standard Homepage, and is a good option for websites that has a lot of intranet users.
- Splash Screen: turns the Homepage document into a splash screen with a Continue button that takes the visitor to the Portal Container - in effect, it is a combination of Single-page Mode and Portal Mode. In this scenario, the Portal will be a blog by default.
- Homepage checkbox: unchecking this box will switch the site to Portal Mode.
- Title: will display the title of the Homepage above your content. This is off by default.
... If these alternatives are not present, it means the Portal is configured to be the Homepage. If so, check the Homepage checkbox. The page will refresh, and the alternatives will be available afterwards.
To use Portal Mode
- Navigate into the Portal [go to Root, then click the Portal link in the File Manager]. Click More actions there, then the Layout action.
- If the Portal is not already the Homepage, there will only be a single option: check the Homepage box. This will suppress the Homepage document and make the Portal Container your Homepage instead.
 The browser window will refresh to set the Portal as Homepage. Afterwards, click the Layout action again, and the Layout popup will have more alternatives to choose from.
These are presentation modes for any content you want to fill the Portal with - different ways of combining many pages and files into a single Homepage.
- Blog: you can fill the Portal with anything, but it will only display blog posts. Blog posts can be web pages, text documents, e-mails, Podcasts and YouTube movies. To set a sorting preference for your blog, click the Sorting Action - the up/down arrow to the right of the Layout Action in the picture above.
- Newspaper: a condensed blog mode displaying the first paragraph of text for any blog post, with a More link for each post.
- Media Collection: will display absolutely everything in the Portal container in a grid of tiles, with previews and thumbnails of the content inside each tile. This is a good option for video presentations, for a directory of sub-websites, or a collection of WebStores.
- E-Commerce: the Portal is a WebStore, and will only display Product Pages.
- Expanded Listing: a big, flat list displaying Icons and Avatars for all content. The perfect mode for displaying sub-websites.
- Resource Collection: will display any kind of content, but will group different content types into tabs. Note that a tabbed Layout will only display up to 48 objects at a time.
POPULATING THE PORTAL
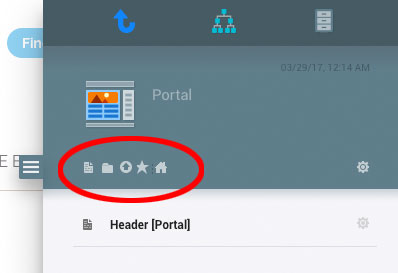
 Like all Layouts, the Portal has a number of pickers in its Action toolbar. Which pickers are available depends on its current Layout Setting: for example will only the Blog Post picker be present if the Portal is configured as a blog.
To create new content, click an appropriate picker to bring up the Page Picker.
Portal Pickers, from left to right:
- Page Picker: contains Page and blog post templates.
- Layout Picker: contains Layouts - container templates. Will only be present if the Portal is a Media Collection.
- Upload: to upload images and files from your computer.
- Sticky Picker: to create a sticky and/or title for the Portal. Will only be present if a sticky does not already exist.
- Project Picker: this Picker only exists in the Portal. For making project sites and sub-websites. Projects and Sub-sites are basically the same thing, except that a Project is empty, while Sub-sites are fully populated websites with their own menus, sidebars and footers.
The Header [Portal] Document
This is a Sticky for the Portal - a special page that gives the Portal its title. Click it to edit it. The Header will not necessarily exist; this depends on how the Administrator set up your website. If it does not, you can create it from the Sticky Picker.
